
Recipe
Honey Cake Recipe: A Soft, Golden Cake with a Simple Honey Glaze
Nov
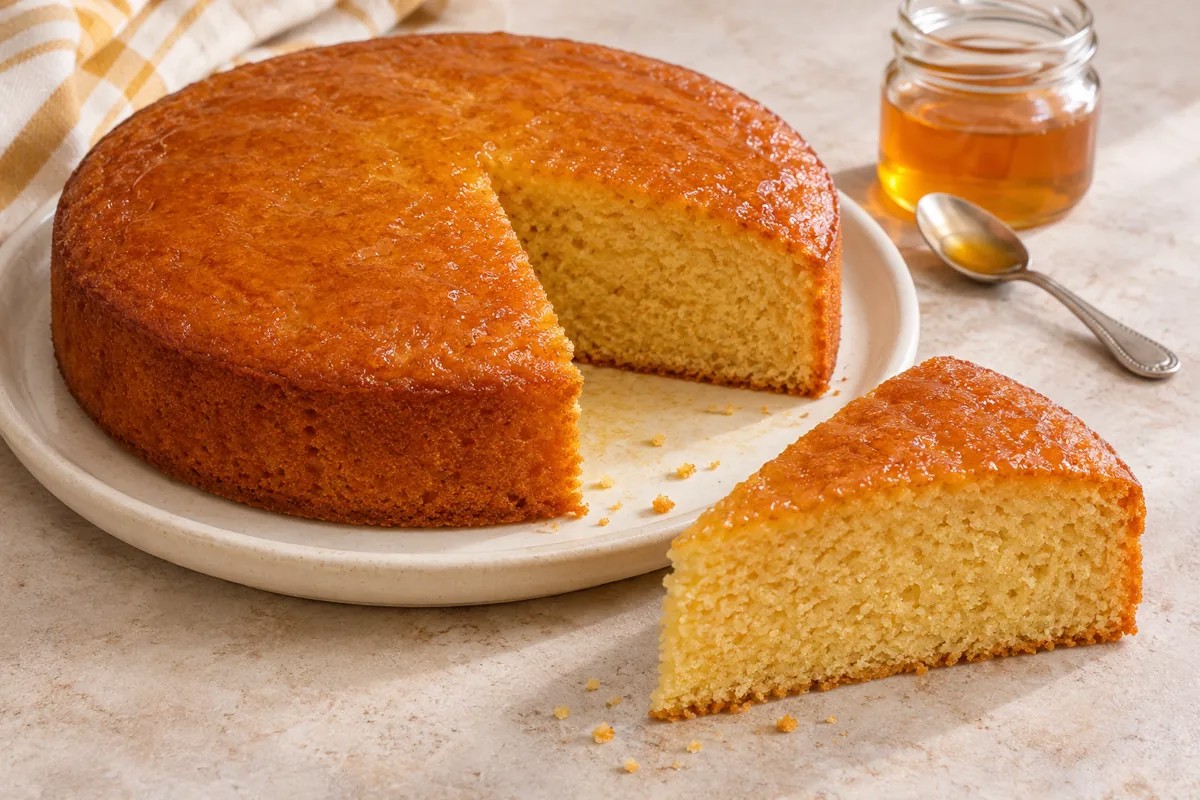
A good honey cake needs more than sweetness. The honey should come through in the aroma, the crumb should be tender, and the topping should add a light sheen without making each slice sticky. This honey cake recipe combines butter, vanilla and honey in a single round cake, finished with a thin honey glaze.
Serve it in small wedges with tea or coffee, or add fresh fruit when you want a simple dessert. There is no filling to assemble or frosting to whip: most of the work happens in one mixing bowl, with a second bowl for the dry ingredients.
What kind of honey cake does this recipe make?
This is a plain honey butter cake with honey mixed into the batter and brushed over the baked surface. Expect a golden top and a close, tender crumb rather than the airy texture of a whisked sponge.
Indian bakery-style honey cake, with its syrup-soaked sponge, jam and coconut topping, is a different preparation. Russian Medovik is different again, with multiple thin layers and cream. The instructions below make one simple cake with a light glaze.
Honey cake recipe at a glance
| Detail | Recipe guide |
|---|---|
| Yield | One 20 cm / 8-inch round cake |
| Portions | 8–10 slices |
| Preparation | About 20 minutes |
| Estimated baking time | 35–45 minutes; start checking at 30 minutes |
| Cooling and finishing | Allow about 1 hour |
| Total time | Approximately 2 hours, including cooling |
| Cake tin | Light-coloured metal tin, 20 cm wide and at least 5 cm deep |
| Oven setting | 170°C conventional or 150°C fan, fully preheated |
| Shelf position | Middle shelf |
| Equipment | Digital scale, measuring spoons, two bowls, electric mixer, spatula, baking paper, rack and skewer |
The baking time is a guide. Oven accuracy, tin material and the temperature of your ingredients can change how quickly the centre cooks.
Ingredients for honey cake
Weighing is the most consistent approach, especially for flour and honey. The household measures below are approximate and use a standard 240 ml measuring cup, a 15 ml tablespoon and a 5 ml teaspoon. A tea mug is not a reliable substitute for a measuring cup.
For the cake
| Ingredient | Weight or volume | Approximate household measure | Preparation and purpose |
|---|---|---|---|
| All-purpose flour / maida | 240 g | 2 cups, spooned in and levelled | Gives the cake structure; do not pack flour into the cup |
| Unsalted butter | 113 g | ½ cup | Soften until it takes a light finger impression but remains solid |
| Caster sugar | 100 g | ½ cup | Fine sugar works into softened butter more easily than coarse crystals |
| Liquid honey | 170 g | ½ cup | Provides the main flavour; use a honey whose taste you enjoy |
| Large eggs | About 100 g without shells | 2 large eggs | Bring to room temperature so they blend more easily |
| Milk | 120 ml | ½ cup | Use at room temperature |
| Baking powder | 8 g | 2 level teaspoons | Use baking powder, not an equal amount of baking soda |
| Fine salt | About 1.5 g | ¼ teaspoon | Balances the sweetness |
| Vanilla extract | 5 ml | 1 teaspoon | Supports the honey flavour without overwhelming it |
For the thin honey glaze
| Ingredient | Weight or volume | Household measure | Purpose |
|---|---|---|---|
| Liquid honey | About 42 g | 2 tablespoons | Adds a light honey finish |
| Warm water | 5 ml | 1 teaspoon | Helps the honey spread in a thin layer |
The glaze is a surface finish, not a soaking syrup. There is no need to pierce the cake or pour liquid through it.
Before you start
- Check that your tin is the stated size. A smaller tin produces a deeper cake and changes the baking time.
- Take the butter, eggs and milk out ahead of mixing, without leaving perishable ingredients standing in a hot kitchen for an extended period.
- Check the date and storage instructions on the baking powder.
- Measure everything before beating the butter. Once flour meets liquid, the batter should move through the remaining steps without unnecessary delay.
- If the honey has crystallised, stand its container in warm water and stir until fluid. Let it return to room temperature before measuring and mixing.
How to make honey cake, step by step
1. Prepare the tin and preheat the oven
Heat the oven to 170°C conventional or 150°C fan. Lightly grease the tin and line its base with baking paper. Keep the middle shelf clear so the tin can sit near the centre of the oven.
Use a fully preheated oven. Putting the batter into an oven that is still warming up makes the timing less predictable.
2. Combine the dry ingredients
Whisk the flour, baking powder and salt together in a separate bowl. Break up any visible lumps, or sift the mixture if necessary.
Distributing the baking powder now is easier than trying to mix it evenly through a finished batter.
3. Beat the butter and sugar
Beat the softened butter and caster sugar with an electric mixer at medium speed for about 3–4 minutes, pausing to scrape the base and sides of the bowl.
Look for a mixture that is lighter in colour and slightly increased in volume. It does not need to become perfectly smooth; a little fine sugar texture can remain. If the butter becomes shiny and oily, it is too warm to cream effectively.
4. Mix in the honey, then the eggs
Add the honey and beat briefly until blended. Add the eggs one at a time, mixing after each addition, then mix in the vanilla.
Scrape the bowl again. A slightly curdled appearance can occur, especially if the eggs are cooler than the butter mixture. Continue with the measured flour as directed; do not add extra flour simply to make this stage look smoother.
5. Add the flour mixture and milk
With the mixer on its lowest setting, add about one-third of the dry mixture, followed by half the milk. Repeat, then finish with the remaining dry mixture.
Stop the mixer as soon as the ingredients are mostly combined. Use a spatula to fold any remaining flour from the bottom of the bowl into the batter.
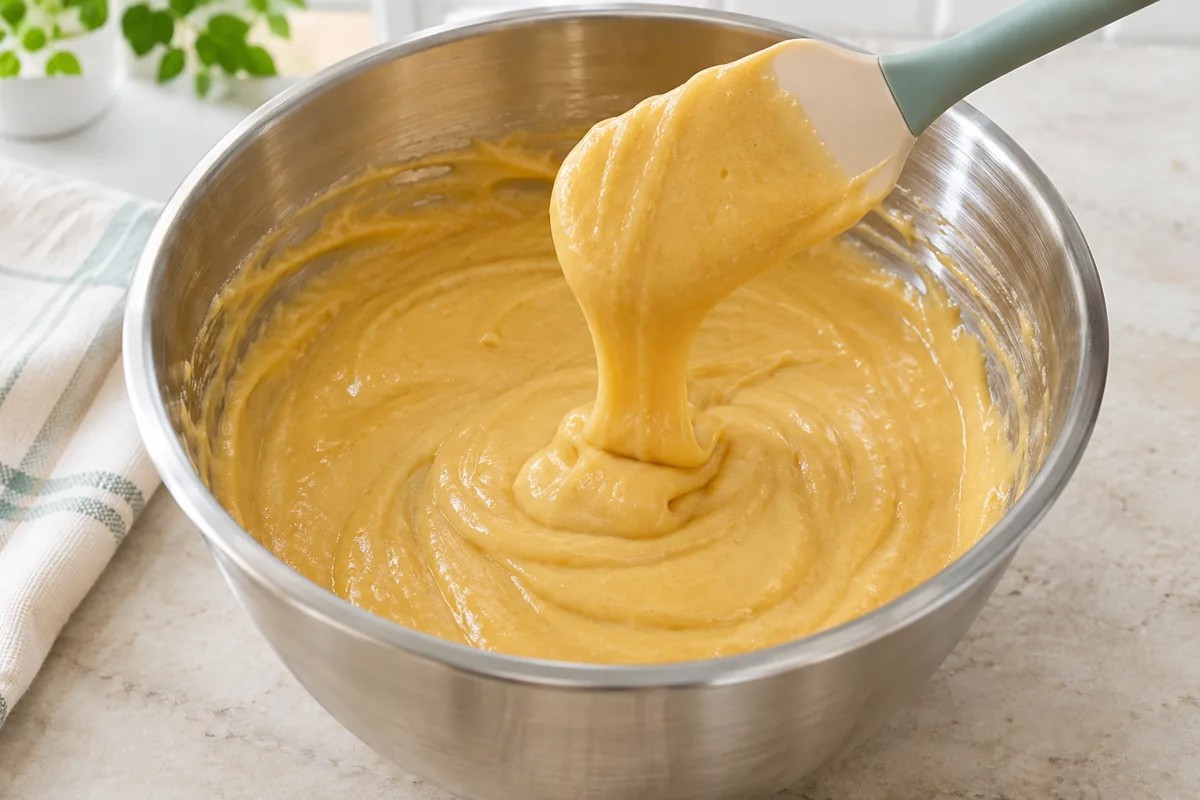
The batter should be smooth and spoonable. It should fall from the spatula in a broad, heavy ribbon rather than run like milk. Avoid adding more flour or milk just to match a picture: small differences in temperature can affect its appearance.
6. Fill the tin and bake
Scrape the batter into the prepared tin and smooth the surface. The tin should be no more than about two-thirds full; do not force extra batter into an undersized tin.
Bake on the middle shelf for an estimated 35–45 minutes. Start checking at about 30 minutes, opening the door briefly and gently. Look for several signs together:
- The top is golden and the centre no longer looks wet.
- The centre springs back gently after a light touch.
- A skewer inserted into the centre comes out clean or with a few crumbs, without shiny raw batter.
If the surface is already brown but the centre needs longer, loosely tent the tin with foil and continue baking. Check again after a few minutes. Do not press the foil onto the cake.
7. Cool before turning out
Let the cake rest in its tin for about 15 minutes. Loosen the edges carefully, turn it onto a rack, remove the baking paper, and return it upright.
A warm cake is fragile. If it seems too delicate to handle, allow it a little more time in the tin rather than forcing it out.
8. Brush on the honey glaze
Stir the glaze honey and warm water together. While the cake is still slightly warm, brush a thin layer over the top. Use only enough to coat the surface lightly; stop if the liquid begins to pool.
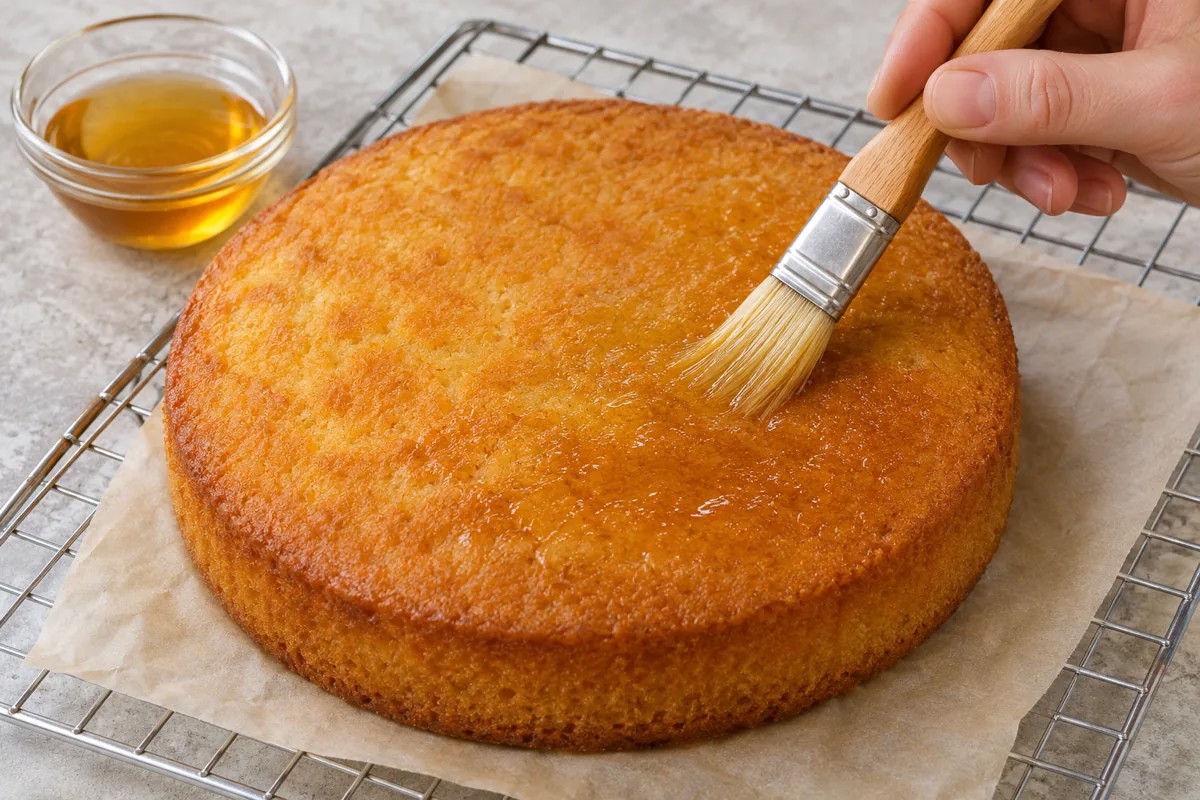
Allow the cake to finish cooling before cutting it into neat wedges. For a warm serving, give the crumb time to settle first and handle the slices gently.
Common honey cake problems and how to avoid them
These are possible causes, not a diagnosis from appearance alone. Check your measurements and oven temperature before changing several ingredients at once.
| Problem | Possible causes | What to change next time |
|---|---|---|
| Dry, crumbly slices | Too much flour, too long in the oven, or a tin that bakes the batter too shallowly | Weigh the flour, use the stated tin and check the centre earlier |
| Dense or heavy crumb | Butter too cold or melted, insufficient creaming, or prolonged mixing after flour was added | Soften butter correctly, cream before adding honey and minimise final mixing |
| A sunken centre | Underbaking, excess raising agent or a disturbance before the structure has set | Measure baking powder carefully and confirm the centre is baked before removing the tin |
| Dark top with a wet middle | Oven running hot, a dark tin, or batter deeper than intended | Check oven accuracy, use a suitable tin and shield the top loosely if needed |
| Gummy streaks inside | Undermixed pockets, underbaking or slicing while very hot | Scrape the bowl thoroughly, test the centre and allow the cake to cool |
| Unpleasant bitter taste | Strongly flavoured honey, excess baking powder or a burnt crust | Taste the honey first, level the measuring spoons and watch browning |
| Sticky or soggy surface | Too much glaze, or covering the cake while still warm | Brush a thin coating and cool fully before covering |
| Cake sticks to the tin | Unlined base, insufficient greasing or turning out too soon | Line the base, grease lightly and allow the initial cooling time |
Choosing honey and making ingredient changes
A mild floral honey lets the butter and vanilla remain noticeable. A darker or more strongly flavoured honey can give a more pronounced result. Taste a small amount before baking: the cake cannot disguise a flavour you already dislike.
Keep the first bake close to the listed formula so you have a useful baseline.
- Salted butter: It can be used, with the added salt omitted. The final saltiness will depend on the butter.
- Wholemeal flour: It changes liquid absorption and texture. Do not assume a complete swap will give the same crumb.
- Sugar reduction: Honey already contributes substantial sweetness. Removing sugar or replacing it with more honey also changes moisture and structure, so it needs a separate trial.
- Baking soda: It is not interchangeable spoon for spoon with baking powder in this formula.
- Removing eggs: This recipe relies on them for structure. Use a recipe formulated for that change rather than simply leaving them out.
How to serve honey cake
The simplest serving is a plain wedge with tea or coffee. For a dessert plate, add a few berries or sliced seasonal fruit. A small spoonful of plain yoghurt can balance the sweet glaze; add it to individual servings just before eating.
Avoid pouring extra honey over the entire cake before storing it. Anyone who wants more can add a little to their own slice.
Cooling and storage guide
Cool the cake completely before covering it. Trapped steam can leave the surface wet. The guide below is for the plain cake with its thin honey glaze; fresh fruit, yoghurt or cream should be stored separately and added when serving.
| Storage option | How to pack it | Suggested quality window |
|---|---|---|
| Cool room temperature | Airtight container, away from sunlight and heat | Best within 1–2 days; choose the refrigerator sooner in a hot or humid kitchen |
| Refrigerator | Airtight container to limit drying and food odours | Aim to eat within 4–5 days |
| Freezer | Wrap cooled individual slices, then place in a freezer-safe sealed bag or box | Best quality within about 2 months |
These are conservative quality guides rather than guarantees for every kitchen. Thaw frozen slices covered in the refrigerator, then allow a serving to lose its chill before eating. Discard cake with visible mould or signs of spoilage; do not remove just the affected patch and serve the rest.
For the next bake, note the tin you used and the time when the centre first passed the skewer test. That observation is more useful than repeatedly adding a few minutes to a recipe time that may not match your oven.
More recipes to try
For a richer fruit-filled bake, try this homemade fruit cake recipe. If you prefer a cake with a fresh cream finish, the pineapple cake recipe explains a different approach.
Recipe disclaimer and food safety note
This recipe is shared for general information and has not been kitchen-tested by our team. Ingredient quantities, baking times, yield and storage periods are approximate guides. Results vary with ingredients, equipment, measurements and kitchen conditions; a particular texture, appearance or outcome is not guaranteed.
The recipe contains wheat (gluten), milk and eggs. Check ingredient labels and suitability for anyone with food allergies or dietary restrictions. Do not taste raw batter, and bake the cake thoroughly before serving. Because it contains honey, this cake and its glaze should not be given to babies under 12 months. Follow safe food handling and storage practices and your appliance manufacturer’s instructions.
Images are AI-generated illustrations and do not show a cake produced from a test of this recipe. This notice does not exclude rights or liability that cannot lawfully be excluded.
