
Food and Drink, Food & Cooking, Recipe
Chocolate Truffle Cake Recipe with Eggs for Birthdays and Anniversaries
Oct
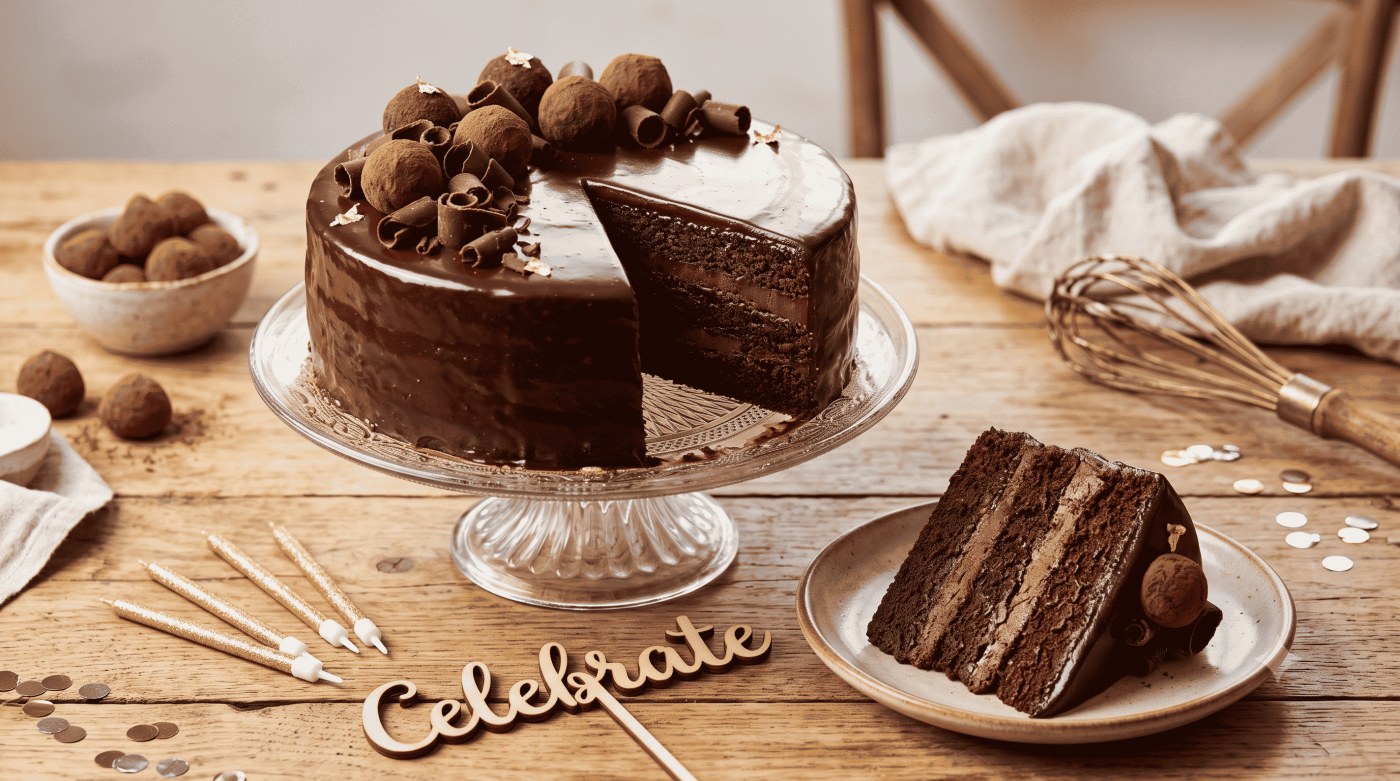
A chocolate truffle cake should deliver more than a glossy finish. The cake layers need to stay soft, the filling should taste distinctly of chocolate, and the coating should slice cleanly without becoming a hard shell.
This guide combines a chocolate cake base with a dark chocolate ganache filling and frosting. You will also find decoration ideas, a make-ahead schedule, and practical fixes for common problems.
What Is a Chocolate Truffle Cake?
For this recipe, chocolate truffle cake means chocolate cake layered and coated with ganache: a mixture of chocolate and cream. It takes inspiration from the rich centres of chocolate truffles, but you do not need to make individual truffles to assemble the cake.
Compared with a cake covered in buttercream, this version puts more emphasis on the flavour of the chocolate itself. Choose chocolate you enjoy eating because its taste will carry through to the finished cake.
Recipe at a Glance
| Detail | Guide |
|---|---|
| Yield | One two-layer, 9-inch cake |
| Servings | Approximately 12–16, depending on slice size |
| Equipment | Two 9-inch round tins, mixer, scales, cooling rack, spatula |
| Preparation | Approximately 25–35 minutes |
| Baking | 30–35 minutes |
| Cooling and setting | Allow another 2–3 hours |
| Oven | 175°C conventional; approximately 160°C fan |
| Dietary information | Contains eggs, wheat and dairy |
Plan for roughly four hours from starting the recipe to serving. Cooling time will vary with your kitchen temperature.
Ingredients
For the Chocolate Cake
The cake base is adapted from Hershey’s “Perfectly Chocolate” recipe.
- 220 g all-purpose flour or maida
- 400 g caster or granulated sugar
- 65 g natural unsweetened cocoa powder
- 1½ teaspoons baking powder
- 1½ teaspoons baking soda
- 1 teaspoon salt
- 2 large eggs
- 240 ml milk
- 120 ml neutral vegetable oil
- 2 teaspoons vanilla extract
- 240 ml boiling water
For the Dark Chocolate Ganache
- 450 g dark chocolate, approximately 50–60% cocoa, finely chopped
- 300 g dairy whipping or heavy cream, preferably at least 35% fat
This uses a 3:2 chocolate-to-cream ratio by weight. It provides a starting point for a coating that becomes spreadable as it cools. Chocolate brands differ, so judge the texture before using it.
Optional Decorations
Choose one or two rather than covering every part of the cake:
- Chocolate curls or shavings
- Fresh strawberries, washed and thoroughly dried
- Ready-made chocolate truffles
- White chocolate for a short piped message
- Birthday candles or an anniversary topper
How to Make Chocolate Truffle Cake
1. Bake the Layers
Preheat to 175°C. Grease both tins and line their bases.
Mix the flour, sugar, cocoa, raising agents and salt. Add the eggs, milk, oil and vanilla; beat on medium speed for two minutes. Carefully stir in the boiling water. The batter will be thin.
Divide between the tins. Bake for 30–35 minutes, until a skewer inserted centrally comes out clean. Rest in the tins for 10 minutes, then transfer to racks and cool completely.
2. Make the Ganache
Put the chopped chocolate in a heatproof bowl. Heat the cream until steaming, with small bubbles around the edges.
Pour over the chocolate, wait approximately three minutes, then stir gently from the centre outward until smooth. If pieces remain, warm the bowl briefly over gently simmering water and stir again.
Leave the ganache to cool until it holds soft ridges when stirred. It should spread without running or pulling at the cake. Avoid frosting while either component is warm.
3. Fill and Stack
Place the first layer on a cake board or serving plate. If it has a pronounced dome, trim it with a serrated knife once completely cool.
Spread approximately one-quarter of the ganache over the first layer, leaving a small margin at the edge. Add the second layer and check that the cake sits level.
Keep the filling modest: a very thick layer can squeeze out when the top cake is added.
4. Coat the Cake
Spread a thin layer of ganache over the top and sides to catch loose crumbs. Chill briefly until this coating feels set, then add the remaining ganache.
Use an offset spatula for a smooth finish, or make gentle swirls with the back of a spoon. Swirls are a useful choice if you do not have a cake scraper.
Refrigerate until the filling and coating have firmed enough for the cake to hold its shape.
Birthday and Anniversary Decoration Ideas
For a Birthday
Leave a clear space in the centre for the name or age. Place chocolate curls around the edge, then add candles shortly before serving.
For a colourful finish, use a small amount of sprinkles as a border. Check decorations for allergens if the cake will be shared with children or guests with dietary restrictions.
For an Anniversary
A short message such as “Happy Anniversary” or “Another Year Together” keeps the design personal without crowding the surface.
Arrange a few strawberries along one edge and add a contrasting white chocolate message. Dry fruit thoroughly before placing it on the cake, and add it close to serving time.
If using decorative flowers, choose food-safe decorations or protect the cake with suitable flower picks. Florist flowers should not be pushed directly into the cake.
Common Problems and How to Fix Them
| Problem | Possible cause | What to do |
|---|---|---|
| Dry cake | Overbaking or too much flour | Weigh ingredients and check doneness at the earliest suggested time. |
| Sunken centre | Underbaking, incorrect raising-agent quantities, or an oven-temperature issue | Measure carefully and check the centre before removing the cake. |
| Ganache runs down the sides | Ganache is warm, or the cake has not cooled | Wait until both are cool and the ganache is spreadable. |
| Ganache is too stiff | It has become too cold | Warm gently in short intervals, stirring between each. |
| Chocolate pieces remain | Pieces were large or the cream cooled too quickly | Apply gentle heat while stirring; avoid overheating. |
| Layers slide | Filling is too soft or too thick | Use less filling, cool it further, and chill the assembled cake. |
| Crumbs appear in the finish | Frosting was applied directly to exposed cake | Add a thin crumb coat before the final coating. |
Change one thing at a time when troubleshooting. Adding extra cream immediately to warm, runny ganache can make it even softer.
A Make-Ahead Plan for Your Celebration
The day before: Bake and cool the layers. Wrap them once fully cool and refrigerate. You can also make the ganache and refrigerate it in a covered container.
On the celebration day: Gently bring the ganache back to a workable consistency, assemble the cake, and allow time for it to set.
Before serving: Add fresh fruit and candles. Let the refrigerated cake soften slightly so the ganache is pleasant to eat. In a warm kitchen, this may take only a short time.
Keep the finished cake covered and refrigerated. For best quality, aim to finish it within three days; follow any shorter storage instructions for your ingredients and toppings.
Frequently Asked Questions
Can I Make This Chocolate Truffle Cake Eggless?
Use a recipe developed specifically for an eggless chocolate cake, then add the ganache from this guide. Simply removing the two eggs changes the structure and moisture balance.
Can I Use Milk Chocolate Instead of Dark Chocolate?
Yes, but do not assume it needs the same amount of cream. Milk chocolate ganache generally needs a different ratio to reach a similar firmness. Use a milk-chocolate-specific ganache formula.
Can I Use Drinking Chocolate Instead of Cocoa Powder?
Drinking chocolate commonly contains added sugar and other ingredients. Use natural unsweetened cocoa for the cake quantities given here.
Do I Need Sugar Syrup Between the Layers?
It is optional. Start without it; excessive syrup can make a soft cake difficult to stack and slice.
Can I Bake It in One Deep Tin?
The depth changes how the centre cooks. Use the two tins specified here, or follow a recipe with a tested single-tin baking time.
How Do I Cut Neat Slices?
Use a sharp knife warmed in hot water and wiped dry. Clean the blade between cuts to reduce chocolate smears.
A celebration cake does not need complicated decoration. Give the layers time to cool, work with ganache at a spreadable consistency, and leave room for a personal message.
