
Recipe
Fondant Cake Recipe: How to Bake, Cover and Decorate
Nov
A smooth fondant cake starts with the surface underneath it. A level cake, an even buttercream coating and a carefully measured sheet of fondant make decorating much easier.
This fondant cake recipe takes you through a simple vanilla cake, a buttercream coating and a ready-to-roll fondant finish. You will bake one low, 8-inch round cake and decorate it with small cut-out shapes. Making the fondant itself is a separate process; this guide uses purchased rolling fondant.
What Is a Fondant Cake?
A fondant cake is a baked cake covered with a pliable sugar paste called rolled fondant. The paste forms a smooth outer layer that can be coloured, cut and shaped.
The cake underneath still provides most of the flavour. Fondant supplies the finish and decorations. Buttercream sits between them, helping the covering stick and smoothing out small surface imperfections.
For your first attempt, choose a round cake with a simple design. Flat hearts, dots and lettering are easier to handle than tall figures or multiple tiers. You can browse designer cakes for colour and decoration ideas before choosing your own finish.
Recipe at a Glance
| Detail | What to plan for |
|---|---|
| Cake size | One low, 8-inch round cake |
| Servings | Approximately 8–10, depending on slice size |
| Preparation | About 20 minutes |
| Baking | Approximately 30–35 minutes |
| Cooling | Allow 1½–2 hours, or longer until completely cool |
| Coating, covering and simple decoration | Approximately 45–60 minutes |
| Chilling the coating | About 20 minutes, or until firm |
| Total time | Allow roughly 3½–4½ hours; cooling and your working pace may extend this |
Ingredients
For the Vanilla Cake
- 180 g plain flour or maida
- 150 g fine sugar
- 120 ml melted unsalted butter, cooled until lukewarm
- 62 g plain yogurt, whisked smooth
- 120 ml water
- 1 teaspoon baking powder
- ½ teaspoon baking soda
- 1 tablespoon white vinegar
- 1 teaspoon vanilla extract
- A pinch of salt
For the Buttercream Coating
- 150 g unsalted butter, softened
- 300 g icing sugar, sifted
- ½ teaspoon vanilla extract
- 1–2 teaspoons water, only if needed
This makes approximately 450 g of buttercream. Apply only enough to produce an even coating; you may have some left over.
For the Fondant Finish
- 750 g ready-to-roll fondant available for covering and small decorations
- A little cornflour or icing sugar for dusting
- Gel food colouring, optional
- A little food-grade solid vegetable shortening, optional
- Edible glue, optional, for attaching decorations
The fondant quantity includes a working allowance and trimmings. It is not the amount you should leave on the cake. Check your fondant manufacturer’s coverage chart, particularly if your cake is taller than expected.
Equipment
Have an 8-inch round cake tin, baking parchment, mixing bowls, a whisk, measuring spoons and a cooling rack ready. For decorating, use a sturdy cake board, palette knife, rolling pin, ruler, fondant smoother and a small sharp knife. A rotating cake stand is helpful but optional.
Check that your rolling pin and work surface are smooth. Fondant can pick up dents, crumbs and lint that are difficult to remove once rolled.
How to Make a Fondant Cake
1. Bake the Vanilla Cake
Preheat the oven to 180°C, conventional setting. Grease an 8-inch round tin and line its base with parchment.
Sift together the flour, baking powder and salt. Separately, whisk the sugar, yogurt, water, vinegar and vanilla until evenly combined. Stir the baking soda into this wet mixture.
Add the wet mixture and melted butter to the flour. Mix just until smooth, then transfer immediately to the tin.
Bake for approximately 30–35 minutes. A skewer inserted into the centre should come out without wet batter. Cool briefly in the tin, then carefully transfer to a rack. Let the cake cool completely.
2. Make the Buttercream
Beat the softened butter until creamy. Add the icing sugar gradually, mixing slowly at first. Add the vanilla, then beat until smooth.
If it is too stiff to spread without dragging crumbs from the cake, add water a little at a time. Stop when the buttercream spreads easily and holds its shape. It should not flow off the spoon.
If the mixture becomes very soft in a warm kitchen, chill it briefly and mix again before coating.
3. Level and Coat the Cake
Once the cake is completely cool, trim any raised dome with a serrated knife. Keep this beginner version as a single layer.
Place it on the cake board, using a small dab of buttercream underneath to help hold it in position. Spread a thin coat over the top and sides to catch loose crumbs.
Chill briefly to firm that coat, then fill any visible dips with a little more buttercream. Smooth the surface with a palette knife or scraper. Allow about 20 minutes of chilling overall, adjusting until the coating is firm.
Before moving on: the cake should feel stable, with a level top and smooth sides. If it has visible ridges or dents, correct them now. Fondant will follow the shape underneath.
4. Measure Before Rolling
Measure the coated cake’s diameter and height. For a round cake, calculate the minimum sheet size like this:
Fondant circle diameter = cake diameter + twice the cake height.
For example, a cake measuring 20 cm across and 4 cm tall needs a circle at least 28 cm across. A small positioning allowance brings this to approximately 29–30 cm. Measure your actual cake rather than assuming it has reached a particular height.
Avoid rolling a much larger sheet than necessary: the extra hanging weight makes it harder to support while covering.
5. Prepare and Roll the Fondant
Knead the fondant until it bends smoothly. If using gel colouring, add a small amount and knead until the colour is even. Keep unused portions wrapped.
Lightly dust the work surface and roll to the measured diameter. Aim for an even thickness of approximately 3–4 mm, unless the manufacturer advises otherwise. Turn the sheet gently as you work so it does not stick.
Use very little dusting powder. Adding more each time you roll can dry the fondant and encourage cracking.
Before moving on: the sheet should lift from the surface easily and have no thin, translucent patches. Transfer it promptly so the exposed surface does not start to dry.
6. Cover the Cake
Check the buttercream surface. It should be firm and free of visible condensation. If it has become completely dry and crusted, use the lightest brush of water to help the fondant adhere; do not soak it.
Support the sheet over the rolling pin and centre it over the cake. Lower it gently, leaving enough fondant on every side.
Smooth the top first. Next, secure the fondant around the upper edge so the hanging sheet does not pull heavily on it.
Work down the sides in small sections. Lift a loose fold slightly away from the cake, open it out and guide it back against the side. Pressing a closed fold flat traps a crease.
Support the hanging fondant as you work. Pulling it down can stretch it and cause tears near the top edge.
7. Trim and Decorate
Once the sides are covered, trim the excess around the base. Finish with a gentle pass of the smoother.
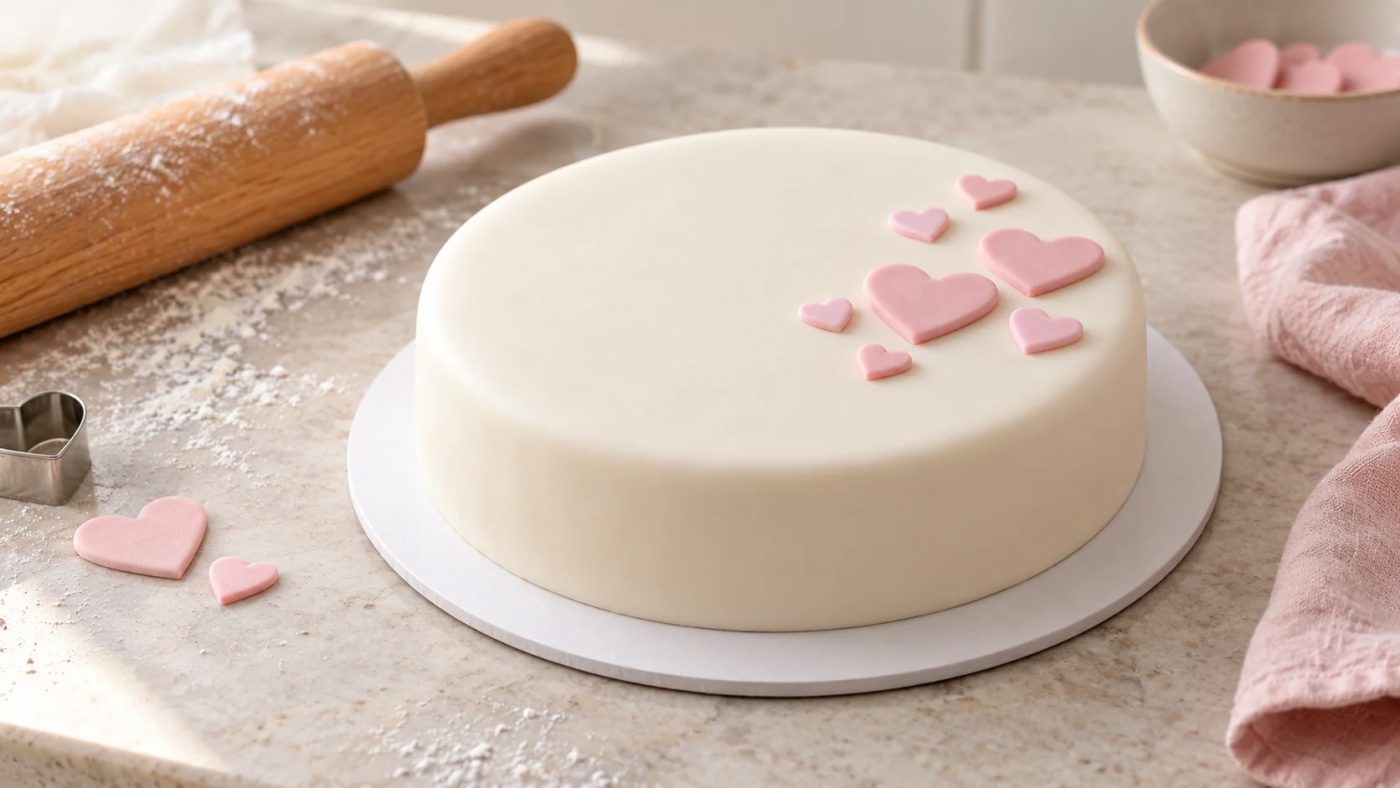
Roll a small portion of the remaining fondant and cut out hearts, circles or letters. Attach them with a tiny amount of edible glue or a light touch of water. Too much moisture can make the surface sticky.
Keep decorations light for this first cake. A small cluster of hearts and a short message can provide a complete design without weighing down the sponge.
For more ideas, look through birthday cakes and choose one element to try, such as a pastel colour scheme or a simple border.
Common Fondant Problems and What to Do
| Problem | Likely cause | Practical fix |
|---|---|---|
| Fine cracks appear while rolling | Fondant is dry, insufficiently kneaded or heavily dusted | Knead until pliable; use a trace of food-grade shortening if the product allows it. Reduce dusting. |
| Fondant tears at the top edge | The sheet is uneven, too thin or hanging unsupported | Support the sides as you smooth. For a major tear, remove and reroll before continuing. |
| Folds gather near the base | Loose fondant has been pressed into pleats | Lift and open each fold before smoothing the section against the cake. |
| Small bubbles appear | Air has become trapped beneath the covering | Release a small bubble with a clean food-use pin at an angle, then smooth gently. Remove and account for the pin immediately. |
| Bumps show through | The coating underneath is uneven | Correct the buttercream before covering; thicker fondant will not reliably disguise a poorly prepared surface. |
| The surface becomes sticky after chilling | Condensation has formed | Leave it untouched while surface moisture dries in a cool, dry setting, while following the cake’s safe storage requirements. |
Working in a Warm or Humid Kitchen
Prepare the cake board, tools and decorations before unwrapping the fondant. Work in the coolest, driest area available, away from steam and direct sunlight.
If the buttercream softens while you are smoothing it, return the cake to the fridge briefly. Trying to cover a cake while its coating moves underneath makes a neat finish harder to achieve.
Use concentrated gel colour sparingly. Large amounts of liquid colouring can soften fondant. For very dark shades, buying pre-coloured fondant can simplify the process.
Storing and Serving Your Fondant Cake
Choose storage according to the frosting, filling and room conditions. Follow the relevant ingredient and fondant manufacturer’s instructions. A sugar covering does not make a perishable filling safe to leave unrefrigerated.
If refrigeration is needed, keep the cake protected in a suitable covered container. Before serving, allow it to warm gradually in its container, within the safe serving limits of its ingredients, to help reduce condensation. Avoid touching or wiping damp fondant.
Wrap clean, unused fondant tightly and store it according to its packaging. Keep scraps that have picked up cake crumbs or buttercream separate from the clean supply.
Cut with a sharp knife, wiping the blade between portions. Remove any non-edible decorations before serving.
