
Food & Cooking, Food and Drink
How to Make a Photo Cake at Home
Sep
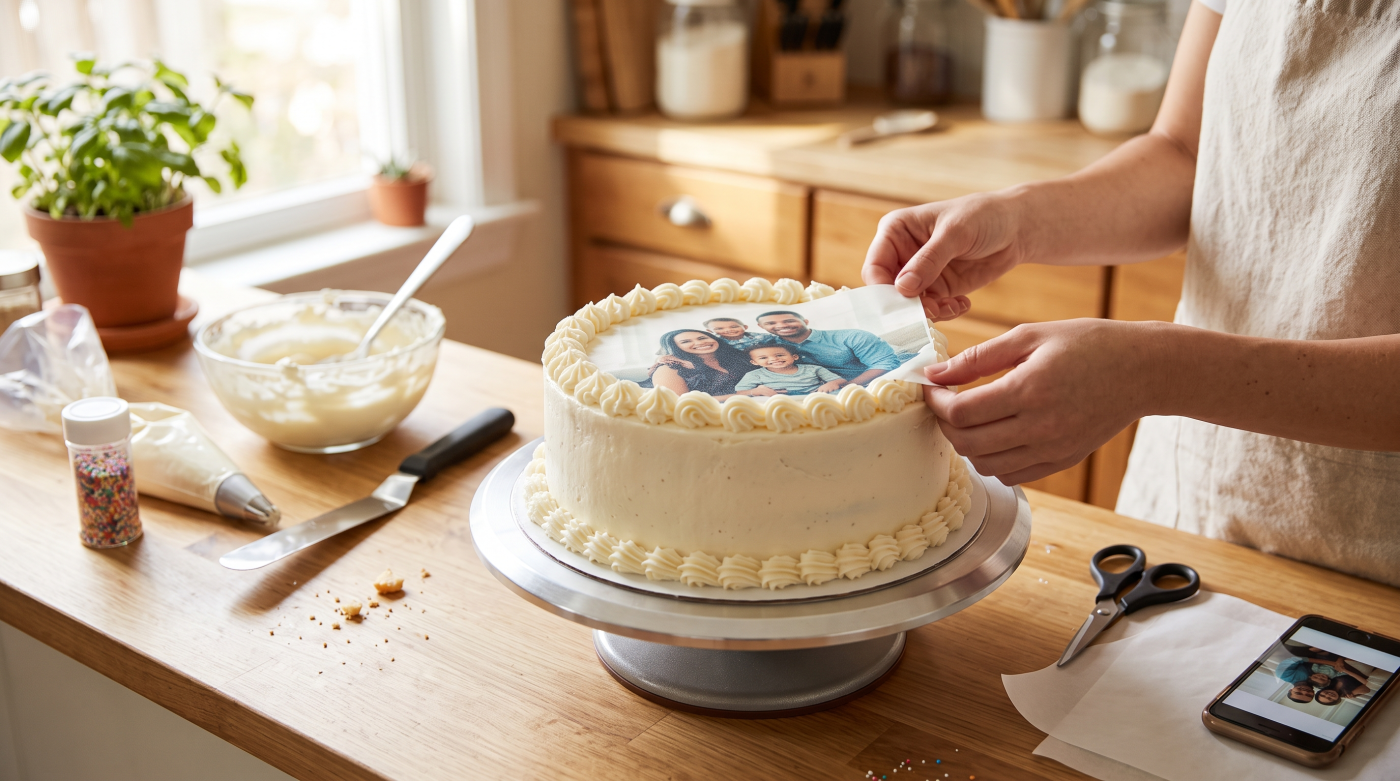
A favourite birthday picture, an old family photograph or a wedding-day moment can become the centrepiece of a cake. You can make one at home using a sponge cake, frosting and a ready-printed edible image—without buying a printer.
To make a photo cake, cover a cooled cake with smooth frosting, remove the backing from a suitable edible frosting sheet and gently place the picture on top. Finish with a piped border. This guide starts with a baked sponge and takes you through choosing, sizing and applying the image.
What is a photo cake
A photo cake carries a picture printed with edible ink on an edible sheet. The picture is a decoration, so you can choose vanilla, chocolate or another cake flavour underneath. For this method, order a frosting sheet intended for direct application to a cake.
Frosting sheets and wafer paper are different products. They have different textures and printing characteristics, so check which one the supplier is sending. Follow the instructions for that specific sheet.
What you need for a small photo cake
Use this shopping list for a round 15 cm (6-inch) cake made with two sponge layers. Frosting quantity will vary with the height of your cake and the amount of piping.
- Two baked and completely cooled 15 cm sponge layers, homemade or bought.
- About 600–750 g prepared vanilla buttercream for filling, coating and a small border.
- One printed edible frosting sheet, approximately 12–13 cm across for this example.
- A cake board, palette knife or spatula, ruler and clean food-use scissors.
- A piping bag and nozzle, if you want a decorative border.
For an eggless photo cake, use eggless sponge and verify the ingredients in the frosting, sheet, ink and decorations. An eggless sponge alone does not establish that the whole cake is eggless. Check allergen information separately.
Choose a photo that will work on a cake
Start with the original image file from your phone or camera. A screenshot of a small social-media picture gives the printer less detail to work with. Choose a bright, sharply focused photograph where the faces are easy to see.
For a round cake, preview the photo inside a circle before ordering. Keep faces, names and important details away from the edge so that cropping and the icing border do not cover them. One clear portrait is often easier to read than a collage of many tiny photos.
Check the finished design at roughly the size it will appear on the cake. Can you read the birthday message comfortably? Are all the faces visible? Ask the printer for a proof showing the exact crop, spelling and print dimensions.
As a planning example, a 13 cm image on a 15 cm cake leaves about 1 cm around the edge. Measure the actual flat top before ordering; a wide piped border needs more room. Ask the supplier what image resolution they need for your chosen print size.
Get your edible image printed
The easiest option for a single cake
Ask a bakery or edible-print supplier whether they offer custom frosting sheets. Send the original photograph, required dimensions, cake shape and any message. Confirm the sheet type, suitable frosting, storage directions and collection or delivery date before paying.
Keep the image protected in its packaging until you are ready to use it. A useful order message is: “I need a round edible frosting-sheet print, 13 cm across, for a buttercream cake. Please send a crop preview and your application instructions.”
If you already have an edible printer
Use a compatible printer dedicated to edible printing, with suitable edible ink and sheets. Never put edible cartridges into a printer that has previously used ordinary ink; changing cartridges does not remove contamination. Follow the equipment supplier’s setup, handling and maintenance instructions.
Prepare the cake before opening the sheet
Place the first sponge layer on a board and spread an even layer of buttercream over it. Add the second layer, checking that the cake sits level. Cover loose crumbs with a thin coat of frosting and let that coat firm before adding the final finish.
Have your image, scissors and piping bag ready before finishing the top. This makes it easier to apply the picture while the surface is suitable, without rushing to find equipment.
How to put the edible photo on the cake
1 Smooth the frosting
Finish the top with a level layer of pale buttercream. Apply the image while the frosting is still receptive, before a dry crust forms. Leave the border until afterwards.
2 Trim and remove the backing
With clean, dry hands, trim the sheet to size using food-use scissors while its backing remains attached. Gently separate the backing as directed by the manufacturer. Stop if it resists rather than pulling hard enough to tear the picture. Remove the backing completely; it is not edible.
3 Position the picture
Check its orientation before it touches the cake. Support the sheet at opposite edges, bring the middle into contact with the frosting, then lower the edges. Gently pat out small wrinkles without rubbing the printed surface.
4 Add the finishing details
Pipe a border around the image. Keep names and faces uncovered, and place candles where they will not obscure the photograph.
Using whipped cream frosting
Whipped cream contains more moisture than many buttercream frostings, which can make edible colours bleed. Check that your sheet is suitable and follow its application timing. Icinginks advises applying the image close to serving and describes using a thin buttercream layer underneath. Do not leave a cream cake unrefrigerated to preserve the picture.
Fixing common photo cake problems
The picture looks blurry before application
Check the original file and the printer’s proof. If the faces already look soft at the required size, choose another photograph or reduce the print size. A larger sheet will not restore missing detail.
The backing will not release or the sheet cracks
Humidity, dryness and handling can affect the sheet. Follow the supplier’s release or conditioning instructions. Avoid experimenting with heat or water on your only print; ask for a replacement if it is damaged.
Colours run or the image looks wet
Avoid splashing the printed surface. Once colours have bled, rubbing will not restore the image. Check the frosting compatibility and moisture instructions before applying a replacement.
How to store a photo cake
The unused edible sheet and the finished cake can need different storage conditions. Keep the sheet according to its packaging instructions. Once it is attached, follow the storage requirements of the cake’s filling and frosting.
Cakes with perishable cream or custard fillings need refrigeration. Keep refrigerated food at 4°C or below and limit its total time outside refrigeration to two hours, or one hour when the air temperature exceeds about 32°C. Include decorating, transport and display time in that total.
Keep the cake covered without letting the cover touch the photo. Follow your recipe or bakery’s guidance on how long to keep the finished cake; the expiry date on an unused sheet does not determine the cake’s shelf life.
Frequently asked questions
Can you eat the photo on a photo cake
Yes, if it is made from an edible sheet and edible ink intended for food use. Remove the backing before applying it. Ordinary photo paper, plastic toppers and their supports must not be eaten. Check the product label if you are unsure what you have.
Can I make a photo cake without a printer
Yes. Order a custom edible print and apply it to your prepared cake. Confirm the dimensions before ordering so you do not have to cut away part of the photograph.
Can I use a chocolate cake
Yes. The cake flavour is separate from the photo decoration. This method uses a pale buttercream finish on top, so you can keep chocolate sponge underneath and use the same decorating steps.
Can I prepare the cake the day before
You can plan the sponge and frosting ahead according to their own recipe and storage instructions. Check your edible-sheet supplier’s timing before adding the picture. Preparing the cake ahead does not mean every type of edible image should be applied the night before.
How much does a homemade photo cake cost
Add together the sponge ingredients or bought cake, frosting, custom print, decorations and any delivery charge for the sheet. Get a quote for your actual print size. For one cake, compare that total with a bakery quote before buying specialist equipment.
Prefer to order a finished photo cake
If you would rather have a baker handle the printing and decoration, choose your favourite picture and order photo cakes with a personalised design. Confirm the flavour, eggless requirements, design proof and delivery availability for your PIN code before ordering.
